Tuesday, May 25, 2010

Cinnamon Rolls with Cream Cheese Icing


Enjoy.

Dough:
  • 1 cup whole milk
  • 3 tablespoons unsalted butter
  • 3 1/2 cups (or more) unbleached all purpose flour, divided
  • 1/2 cup sugar
  • 1 large egg
  • 2 1/4 teaspoons rapid-rise yeast (from 2 envelopes yeast)
  • 1 teaspoon salt
  • Nonstick vegetable oil spray

Filling:
  • 3/4 cup (packed) golden brown sugar
  • 2 tablespoons ground cinnamon
  • 1/4 cup (1/2 stick) unsalted butter, room temperature

Glaze:
  • 4 ounces cream cheese, room temperature
  • 1 cup powdered sugar
  • 1/4 cup (1/2 stick) unsalted butter, room temperature
  • 1/2 teaspoon vanilla extract

For dough:
Combine milk and butter in glass measuring cup. Microwave on high until butter melts and mixture is just warmed to 120°F to 130°F, 30 to 45 seconds. Pour into bowl of stand mixer fitted with paddle attachment. Add 1 cup flour, sugar, egg, yeast, and salt. Beat on low speed 3 minutes, stopping occasionally to scrape down sides of bowl. Add 21/2 cups flour. Beat on low until flour is absorbed and dough is sticky, scraping down sides of bowl. If dough is very sticky, add more flour by tablespoonfuls until dough begins to form ball and pulls away from sides of bowl. Turn dough out onto lightly floured work surface. Knead until smooth and elastic, adding more flour if sticky, about 8 minutes. Form into ball.

Lightly oil large bowl with nonstick spray. Transfer dough to bowl, turning to coat. Cover bowl with plastic wrap, then kitchen towel. Let dough rise in warm draft-free area until doubled in volume, about 2 hours.

For filling:
Mix brown sugar and cinnamon in medium bowl.

Punch down dough. Transfer to floured work surface. Roll out to 15x11-inch rectangle. Spread butter over dough, leaving 1/2-inch border. Sprinkle cinnamon sugar evenly over butter. Starting at 1 long side, roll dough into log, pinching gently to keep it rolled up. With seam side down, cut dough crosswise with thin sharp knife into 18 equal slices (each about 1/2 to 3/4 inch wide).

Spray two 9-inch square glass baking dishes with nonstick spray. Divide rolls between baking dishes, arranging cut side up (there will be almost no space between rolls). Cover baking dishes with plastic wrap, then kitchen towel. Let dough rise in warm draft-free area until almost doubled in volume, 40 to 45 minutes.

Position rack in center of oven and preheat to 375°F. Bake rolls until tops are golden, about 20 minutes. Remove from oven and invert immediately onto rack. Cool 10 minutes. Turn rolls right side up.

For glaze:
Combine cream cheese, powdered sugar, butter, and vanilla in medium bowl. Using electric mixer, beat until smooth. Spread glaze on rolls. Serve warm or at room temperature.

Monday, May 10, 2010

Chicken Breasts Stuffed with Goat Cheese and Basil

Chris and I made this dish several weeks ago on whim, we happened to have chicken, goat cheese and mushrooms so I picked up some basil, green onions, and a $2 bottle of wine from Trader Joe's then we went to work. The end result was so good that Chris did not mind that the meat had not been cooked on the grill. For those of you who don't know Chris very well, he generally only prefers meat that has been grilled- so this dish was a success.

The filling was simple but delicious and the sauce was so good that I was spooning it out of the pan directly into my mouth before the chicken was out of the oven. I love a sauce with a little bit of wine in it. Mmmm.

Chicken
  • 4 boneless chicken breast halves, skinned
  • 1/2 cup fresh goat cheese (about 4 ounces)
  • 2 green onions, thinly sliced
  • 3 basil leaves, shredded or 1 teaspoon dried, crumbled
  • Salt and freshly ground pepper
  • 1 egg, beaten to blend
  • 1/2 cup dry breadcrumbs
  • 2 tablespoons (1/4 stick) unsalted butter melted

Mushroom-Wine Sauce
  • 1/4 cup (1/2 stick) unsalted butter
  • 1/2 pound mushrooms, sliced
  • 1/4 cup dry white wine
  • 2/3 cup chicken stock or canned low-salt broth
  • 4 tablespoons chilled unsalted butter (1/2 stick), cut into 4 pieces
  • Salt and pepper

For chicken:
Preheat oven to 350°F. Pound chicken between sheets of waxed paper to thickness of 1/4 inch using meat mallet. Pat chicken dry. Combine cheese, green onions and basil in small bowl. Season with salt and pepper. Spread cheese mixture lengthwise over half of each chicken piece. Tuck short ends in. Roll chicken up, starting at one long side, into tight cylinders. Tie ends with string to secure. Dip chicken in egg, allowing excess to drip into bowl. Roll in breadcrumbs, shaking off excess. (Can be prepared 4 hours ahead. Refrigerate.)

Place chicken in 8-inch square baking dish. Pour 2 tablespoons melted butter over. Bake until cooked through, about 20 minutes*

For sauce:
Meanwhile, melt 1/4 cup butter in heavy large skillet over medium heat. Add mushrooms and sauté until tender, about 8 minutes. Add wine and boil 3 minutes. Add stock and boil until liquid is reduced by half, about 6 minutes. Remove from heat and swirl in 4 tablespoons cold butter 1 piece at a time. Season sauce with salt and freshly ground pepper. Remove string from chicken. Cut rolls crosswise into 1/2-inch-thick rounds. Fan on plates. Serve immediately, passing sauce separately.

*our chicken took longer than 20 minutes to cook through so be sure to check it before you turn off the oven.

Monday, April 12, 2010

Roasted Red Beet Salad

Ok so I love to eat salads, and am always looking for new salads that aren't boring. This is my new favorite salad, while it doesnt photograph that well it tastes amazing. I used fresh raw beets that I bought at the produce market. Fresh beets are much better than canned. It is totally worth the effort. I roast them in the oven, just wrap them in tin foil, with the oven set to 350 and roast until they are soft, about an hour.

Ingredients

2 beets, roasted and chopped
romaine lettuce
chopped walnuts
blue cheese crumbles

Toss all of the ingredients in a bowl, salt and pepper to taste, mix with a little bit of olive oil.

Enjoy.

Monday, March 22, 2010

Meyer Lemon Curd Marbled Cheesecake


After making the meyer lemon curd cupcakes, we had a lot of lemon curd leftover since we could not manage to consume all two dozen of the cupcakes. The curd sat in our fridge for a couple of days because I could not bring myself to throw it out when it had taken me forever to whisk it to the proper texture. Then we got invited to a dessert night and I found this recipe on epicurious.com that called for curd and had a handy note that said the curd can be made a week ahead of time and refrigerated. This cheesecake was fantastic, I know I say that about every dessert I make, but I happen to have excellent taste in desserts.

If you like cheesecake and lemon- I recommend you make this. Such a delicious mixture of flavors and a beautiful presentation- it looked exactly like the picture on the recipe.

Note: we cooked ours a little over an hour because after the 45 minutes specified our whole cake still jiggled violently. I doubt our oven is calibrated properly though.

Ingredients

For lemon curd:
  • 1 teaspoon finely grated fresh lemon zest
  • 1/2 cup fresh lemon juice
  • 1/2 cup sugar
  • 3 large eggs
  • 1/2 stick (1/4 cup) unsalted butter, cut into small pieces

For crust:
  • 1 1/3 cups finely ground graham cracker crumbs (5 oz)
  • 1/3 cup sugar
  • 1/8 teaspoon salt
  • 5 tablespoons unsalted butter, melted

For filling:
  • 3 (8-oz) packages cream cheese, softened
  • 1 cup sugar
  • 3 large eggs
  • 3/4 cup sour cream
  • 1 teaspoon vanilla
  • Special equipment: a 9- to 91/2-inch (24-cm) springform pan

Make lemon curd:
Whisk together zest, juice, sugar, and eggs in a 2-quart heavy saucepan. Add butter and cook over moderately low heat, whisking frequently, until curd is thick enough to hold marks of whisk and first bubbles appear on surface, about 6 minutes.

Force lemon curd through a fine-mesh sieve into a wide shallow dish, scraping bottom of sieve, then cover surface with wax paper. Cool completely, stirring occasionally, about 30 minutes.

Make and bake crust:
Put oven rack in middle position and preheat oven to 350°F. Invert bottom of springform pan (to make it easier to slide cake off bottom), then lock on side. 3Stir together crust ingredients in a bowl, then press onto bottom and 1 inch up side of springform pan. Place springform pan in a shallow baking pan and bake 10 minutes, then cool crust completely in springform pan on a rack.

Make filling and bake cheesecake:
Reduce oven temperature to 300°F.

Beat together cream cheese and sugar in a bowl with an electric mixer at medium speed until smooth, 1 to 2 minutes. Reduce speed to low and add eggs 1 at a time, beating until incorporated. Beat in sour cream and vanilla until combined.

Pour two thirds of cream cheese filling into crust, then spoon half of lemon curd over filling and swirl curd into filling with a small knife. (Avoid touching crust with knife to prevent crumbs getting into filling.) Repeat with remaining filling and curd.

Bake cheesecake until set 1 1/2 inches from edge but center trembles when pan is gently shaken, about 45 minutes. (Center of cake will appear very loose but will continue to set as it cools.) Transfer springform pan to a rack and immediately run a knife around top edge of cake to loosen. Cool completely, about 2 hours, then chill, uncovered, at least 4 hours. Remove side of springform pan before serving.

Cooks' Notes: ·Lemon curd can be made 1 week ahead and chilled, covered.
·Crust (without filling) can be made 1 day ahead and kept, covered, at room temperature.
·Cheesecake can be chilled, loosely covered, up to 2 days. Cheesecake must be completely chilled before covering to prevent condensation on its surface.

Sunday, March 14, 2010

A Complicated Cupcake


This little cupcake was hours in the making. It involves making a lemon curd, baking the cupcakes, making the icing and then the assembly. We have a Meyer Lemon tree out front that is in full production so I decided to give this recipe a try this afternoon.

The final result is rich and delicious, sweet and tart- this is actually the best tasting cupcake I have ever made from scratch. The cake itself is fantastic and when combined with the frosting and lemon curd filling, this cupcake is a serious dessert.

I would recommend making these for an occasion where they will all get eaten since they are a little time intensive and involve a dozen eggs, almost two boxes of butter and some vanilla beans. Right now Chris and I have 20 something in our kitchen and I am not sure who is going to eat them.

I did not follow the assembly instructions exactly- since I did not have any sanding sugar or some of the decorative tools and since Chris and I were the only ones eating them I was only mildly concerned with the presentation.

Also, the cake itself would be worth making to taste it's deliciousness.

Cupcakes

Ingredients

Makes 2 dozen

  • 1 cup (2 sticks) unsalted butter
  • 2 cups sugar
  • 2 teaspoons vanilla bean paste or 1 vanilla bean, scraped
  • 5 large eggs, separated
  • 1 3/4 cups plus 2 tablespoons plus 1 teaspoon all-purpose flour
  • 1 cup plus scant 1/3 cup cake flour (not self-rising)
  • 2 teaspoons baking powder
  • 1/2 teaspoon salt
  • 1 cup sour cream
  • Meyer Lemon Curd
  • Vanilla Bean Buttercream
  • Sanding sugar
  • 24 raspberries

Directions

  1. Preheat oven to 350 degrees. Line 2 standard muffin tins with cupcake liners; set aside.
  2. In the bowl of an electric mixer fitted with the paddle attachment, beat butter and sugar together until light and fluffy. Add vanilla; beat to combine. Add egg yolks, one at a time, beating well after each addition.
  3. Sift together both flours, baking powder, and salt into a large bowl. With the mixer on low, add flour mixture; mix until well combined. Add sour cream; mix until well combined.
  4. In a clean bowl of an electric mixer fitted with the whisk attachment, beat egg whites until stiff peaks form. Gently fold egg whites into batter.
  5. Fill each muffin cup half full with batter. Transfer muffin tins to oven and bake until a skewer inserted into the center of one of the cupcakes comes out clean, 20 to 24 minutes. Let cupcakes cool completely.
  6. Using an apple corer, make a hole in the top of each cupcake, taking care not to push the corer through the bottom; remove cake from hole. Fill a squirt bottle with lemon curd and squeeze curd into holes.
  7. Fit a pastry bag with a 3/8-inch plain round tip and fill with buttercream. Pipe buttercream in a circular motion on top of each cupcake; sprinkle with sanding sugar. Pipe a dollop of buttercream in the center of each cupcake and top with a raspberry.
Meyer Lemon Curd

Ingredients

Makes enough for 2 dozen cupcakes

  • 1 cup sugar
  • Zest of 3 lemons
  • 3 large eggs
  • 4 large egg yolks
  • 1 cup Meyer lemon juice
  • 5 ounces unsalted butter, chilled and cut into small pieces

Directions

  1. Prepare an ice-water bath. Set a medium bowl in ice-water bath and set aside.
  2. Place sugar and lemon zest in a mortar and grind with a pestle to combine and release the oils. Transfer sugar mixture to a medium heatproof bowl along with eggs and egg yolks; whisk to combine. Place over a saucepan of simmering water and whisk until sugar has dissolved. Add lemon juice and continue whisking until mixture is thick and reaches 160 degrees on an instant-read thermometer, scraping down sides of bowl as necessary. Add butter and whisk until well combined.
  3. Strain lemon mixture through a fine mesh sieve set over prepared bowl. Cover lemon curd with plastic wrap, pressing plastic wrap directly onto surface. Transfer to refrigerator until completely chilled.
Vanilla Bean Buttercream

Ingredients

Makes enough for 2 dozen cupcakes

  • 2 cups (4 sticks) unsalted butter, room temperature, cut into small pieces
  • 3 1/2 cups confectioners' sugar, sifted
  • Pinch of salt
  • 1 vanilla bean, scraped
  • 1 teaspoon pure vanilla extract
  • 1/4 cup milk

Directions

  1. In the bowl of an electric mixer fitted with the paddle attachment, beat butter until creamy. Slowly add confectioners' sugar; beat to combine, scraping down sides of bowl as necessary.
  2. Add vanilla bean seeds and vanilla extract, and beat to combine. Slowly add milk and continue beating on medium-low speed until smooth and creamy, about 5 minutes.
Recipe on Marthastewart.com via Vanilla Bake Shop

Thursday, March 11, 2010

Pasta with Roasted Cauliflower and Garlic


My sister discovered this recipe and I've been making it ever since. If you don't like garlic then this probably isn't for you- but if you're a garlic lover (like myself) this recipe will blow you away. I didn't know that cauliflower could taste like this! Love it.

2 heads garlic , papery skins removed, top quarter of heads cut off and discarded
6 tablespoons plus 1 teaspoon extra-virgin olive oil
1 head cauliflower (about 1 1/2 pounds) (see note)
Table salt and ground black pepper
1/4 teaspoon sugar
1 pound pasta (see note)
1/4 teaspoon red pepper flakes
2 - 3 tablespoons juice from 1 lemon
1 tablespoon fresh parsley leaves , chopped
2 ounces Parmesan cheese , grated (about 1 cup)
1/4 cup chopped walnuts , toasted

Instructions
1. Adjust oven rack to middle position, place large rimmed baking sheet on rack, and heat oven to 500 degrees.

2. Cut one 12-inch sheet of foil and spread flat on counter. Place garlic heads, cut-side up, in center of foil. Drizzle ½ teaspoon oil over each head and seal packet. Place packet on oven rack and roast until garlic is very tender, about 40 minutes. Open packet and set aside to cool.

3. While garlic is roasting, trim outer leaves of cauliflower and cut stem flush with bottom. Cut head from pole to pole into 8 equal wedges. Place cauliflower in large bowl; toss with 2 tablespoons oil, 1 teaspoon salt, pepper to taste, and sugar.

4. Remove baking sheet from oven. Carefully transfer cauliflower to baking sheet and spread into even layer, placing cut sides down. Return baking sheet to oven and roast until cauliflower is well browned and tender, 20 to 25 minutes. Transfer cauliflower to cutting board. When cool enough to handle, chop into rough ½-inch pieces.

5. While cauliflower roasts, bring 4 quarts water to boil in large pot. Add 1 tablespoon salt and pasta; cook until al dente. Squeeze roasted garlic cloves from their skins into small bowl. Using fork, mash garlic to smooth paste, then stir in red pepper flakes and 2 tablespoons lemon juice. Slowly whisk in remaining 1/4 cup oil.

6. Drain pasta, reserving 1 cup cooking water, and return pasta to pot. Add chopped cauliflower to pasta; stir in garlic sauce, ¼ cup cooking water, parsley, and ½ cup cheese. Adjust consistency with additional cooking water and season with salt, pepper, and additional lemon juice to taste. Serve immediately, sprinkling with remaining ½ cup cheese and toasted nuts.

(also from Cooks Illustrated)

Steak tacos

Amazing- you will not be disappointed. I live in an apartment (hence no grill) so being able to cook these on the stovetop makes this even more appealing. Top this with the pickled onions- I was skeptical but they complement this perfectly and are worth the twenty minutes.

PS: Both of these recipes are from Cooks Illustrated- a fabulous source.

Herb Paste
1/2 cup packed fresh cilantro leaves
3 medium garlic cloves , roughly chopped
3 medium scallions , roughly chopped (about 1/3 cup)
1 medium jalapeño chile , stemmed and roughly chopped (see note)
1/2 teaspoon ground cumin
1/4 cup vegetable oil
1 tablespoon fresh lime juice
Steak
1 flank steak (1 1/2 to 1 3/4 pounds), trimmed of excess fat and cut lengthwise (with grain) into 4 equal pieces (see below)
1 tablespoon kosher salt or 1 1/2 teaspoons table salt
1/2 teaspoon sugar
1/2 teaspoon ground black pepper
2 tablespoons vegetable oil
Tacos
12 (6-inch) corn tortillas , warmed (see note)

Instructions
1. FOR THE HERB PASTE: Pulse cilantro, garlic, scallions, jalapeño, and cumin in food processor until finely chopped, ten to twelve 1-second pulses, scraping down sides as necessary. Add oil and process until mixture is smooth and resembles pesto, about 15 seconds, scraping down sides of workbowl as necessary. Transfer 2 tablespoons herb paste to medium bowl; whisk in lime juice and set aside.

2. FOR THE STEAK: Using dinner fork, poke each piece of steak 10 to 12 times on each side. Place in large baking dish; rub all sides of steak pieces
evenly with salt and then coat with remaining herb paste. Cover with plastic wrap and refrigerate at least 30 minutes or up to 1 hour.

3. Scrape herb paste off steak and sprinkle all sides of pieces evenly with sugar and pepper. Heat oil in 12-inch heavy-bottomed nonstick skillet over medium-high heat until smoking. Place steak in skillet and cook until well browned, about 3 minutes. Flip steak and sear until second side is well browned, 2 to 3 minutes. Using tongs, stand each piece on a cut side and cook, turning as necessary, until all cut sides are well browned and internal temperature registers 125 to 130 degrees on an instant-read thermometer, 2 to 7 minutes. Transfer steak to cutting board and let rest 5 minutes.

4. FOR THE TACOS: Using sharp chef’s knife or carving knife, slice steak pieces across grain into 1/8-inch-thick pieces. Transfer sliced steak to bowl with herb paste-lime juice mixture and toss to coat. Season with salt. Spoon small amount of sliced steak into center of each warm tortilla and serve immediately, passing toppings separately.

Sweet and spicy pickled onions

1 medium red onion , sliced thin (about 1 1/2 cups)
1 cup red wine vinegar
1/3 cup sugar
2 jalapeño chiles , stemmed, seeded, and cut into thin rings
1/4 teaspoon table salt

Instructions
Place onions in medium heat-resistant bowl. Bring vinegar, sugar, jalapeños, and salt to simmer in small saucepan over medium-high heat, stirring occasionally, until sugar dissolves. Pour vinegar mixture over onions, cover loosely, and let cool to room temperature, about 30 minutes. Once cool, drain and discard liquid

Monday, March 1, 2010

Sour Cream and Lemon Pound Cake


Last night we had some friends over for dinner and a basket of lemons that need to be juiced so it seemed like the perfect occasion to try this out. I was not disappointed in this cake- it turned out moist and had the perfect lemon flavor, we garnished it with whipped cream and berries.

I was rushing to get this in the oven so I did not sift the dry ingredients and I used regular flour instead of cake flour. Also, I had no idea what a 16 cup tube pan was so I used a loaf pan and made two loaves of the cake. After an hour of baking I would check every five or ten minutes to see if it was done.

For those of you who are like me and do not know what a tube pan is, apparently it is just a pan with a tube in the middle like an angel food cake pan or a bundt pan. Chris looked it up for me after the fact.

Ingredients
  • 3 cups cake flour
  • 1/2 teaspoon baking soda
  • 1/2 teaspoon salt
  • 1 cup (2 sticks) unsalted butter, room temperature
  • 3 cups sugar
  • 6 eggs, room temperature
  • 1/4 cup fresh lemon juice
  • 1 tablespoon grated lemon peel
  • 1 cup sour cream
Preparation

Thursday, February 25, 2010

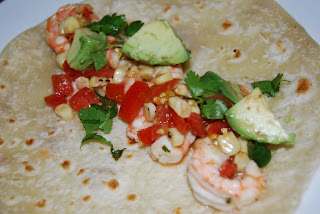
Shrimp Tacos with Corn Relish


Chris and I were trying to figure out what to cook last Sunday when he came up with the excellent idea of making shrimp tacos. I looked up a recipe and we had the stuff on hand so we tried it out and I thought it was delicious. I loved the flavor but Chris thought it needed more kick and less lime. I recommend you try this out and then tweak the marinade to suit your collective palate. Also, I think our shrimp may have been more limey because we lost track of time and let them sit in the marinade for two hours instead of one.

Marinade
  • 1 1/2 tbsp minced red onion
  • 1/2 tsp finely chopped garlic
  • 1 tbsp honey
  • 1 tsp chopped fresh cilantro
  • 1/2 cup freshly squeezed lime juice
  • 1/2 tsp Jamaican jerk or Cajun seasoning
  • 1/8 tsp paprika
  • 16 shrimp, shelled, deveined, tails removed- we just defrosted some of the shrimp we got in a bag at Costco then removed the tails

Corn relish
  • 2 ears corn (or 1 cup canned or frozen and thawed)
  • Vegetable-oil cooking spray
  • 6 Roma tomatoes, diced
  • 1 green onion, chopped
  • Lime- or lemon-pepper seasoning

Tacos
  • Tortillas
  • 1 tsp chopped fresh cilantro
  • 1 green onion, chopped- we added Avocado chunks instead of more green onion.

Combine marinade ingredients with 1/4 cup water and season with salt. Add shrimp; refrigerate 1 hour. To make relish, cut corn kernels off cob. Lightly spray a sturdy skillet with cooking spray and heat over moderately high heat. (Avoid Teflon pans, which should not be used when cooking at such high temperatures.) Stir-fry corn until golden brown. Pour corn into a bowl and add remaining relish ingredients; season with salt. Remove shrimp and reserve marinade. Lightly spray the same skillet with cooking spray and heat on high until very hot. Toss in a few shrimp at a time and cook until just opaque; remove shrimp. Pour marinade into pan, bring to boil and boil for 2 minutes; lower heat and simmer until thick. Put 4 shrimp on each tortilla; top with corn relish and marinade sauce. Sprinkle with cilantro and green onion.

Also, I highly recommend getting the uncooked Tortillaland tortillas. These things are delicious- I can't go back to eating the already cooked kind from the grocery store. We buy these at Costco and if your Costco carries them you have to try them. I think Sam's club also carries them but I have not seen them anywhere else.


Monday, February 15, 2010

Chocolate Crock-Pot Cake


I found this recipe on cjaneanswers.com (her pic) last week and it is fantastic - like a heavy pudding rich chocolate cake. Make it right away! Mine looked just like this - maybe even better. I shamelessly ate two bowls.

1 package chocolate cake mix
1 container of sour cream (8 oz)
1 cup chocolate morsels
1 cup water
4 eggs
3/4 cup vegetable oil
1 package instant chocolate pudding mix

spray crock pot with nonstick cooking spray.
mix cake mix, sour cream, chocolate morsels, water, egss, oil
and pudding mix in a bowl by hand.
pour into crock pot.
cover and cook on low 6-8 hours or high 3-4 hours.

I think cooking on low is probably better. I cooked on high and the edges got a little brown, but not too bad. the entire center was complete bliss.

Tuesday, February 2, 2010

Spinach and Prosciutto Lasagna


I have not done much cooking lately, because of the holidays, and moving- but now that we are mostly settled in to our house I have decided I need to get back in the habit of making more diverse meals. We have pretty much been eating quesadillas or frozen pasta lately.

Last night I made this lasagna; it is fast and delicious. It is the kind of homemade meal I like.

Ingredients

Serves 4

* 2 packages (10 ounces each) frozen chopped spinach, thawed and squeezed dry
* 1 1/2 cups part-skim ricotta
* 1 garlic clove, minced
* Coarse salt and ground pepper
* 2 1/2 cups jarred tomato sauce
* 4 ounces thinly sliced prosciutto, finely chopped
* 6 no-boil lasagna noodles
* 1 cup shredded part-skim mozzarella (4 ounces)

Directions

1. Preheat oven to 375 degrees. Make filling: In a medium bowl, stir together spinach, ricotta, garlic, teaspoon salt, and 1/4 teaspoon pepper; set aside. In another medium bowl, stir together tomato sauce and prosciutto.
2. In an 8-inch square baking dish, spread cup tomato sauce. Layer 2 noodles, 1/3 filling, and 1/3 remaining tomato sauce; repeat twice. Top with mozzarella. Bake until browned, 35 to 40 minutes. Let stand 5 minutes before serving.

From Everyday Food, October 2008

Friday, January 29, 2010

Double Chocolate Brownies


Happy 2010 everyone.

It has been months since I have made homemade brownies, and I was in the mood for something chocolatey, fudgy and delicious so I decided to try out a new recipe. These are, in fact, delicious.

I always like to try new brownie recipes without any additions- so I left out the nuts which Chris so ardently adores. However, this recipe was so good he did not even comment on the missing pecans.

This recipe is now my favorite brownie recipe- although, I am wondering how some of the recipes on Epicurious stack up against it. If you all have a favorite brownie recipe please post it so I can try it.

Also, for those of you who are fans of boxed brownie mixes- Epicurious just did a taste test and a gluten free version came out on top- very interesting. Click here for the full article.

Ingredients

Makes 9 large or 16 small squares

  • 6 tablespoons unsalted butter, plus more for pan
  • 6 ounces coarsely chopped good-quality semisweet chocolate*
  • 1/4 cup unsweetened cocoa powder (not Dutch-process)
  • 3/4 cup all-purpose flour
  • 1/4 teaspoon baking powder
  • 1/4 teaspoon salt
  • 1 cup sugar
  • 2 large eggs
  • 2 teaspoons pure vanilla extract

Directions

  1. Preheat oven to 350 degrees. Line a buttered 8-inch square baking pan with foil or parchment paper, allowing 2 inches to hang over sides. Butter lining (excluding overhang); set pan aside.
  2. Put butter, chocolate, and cocoa in a heatproof medium bowl set over a pan of simmering water; stir until butter and chocolate are melted. Let cool slightly.
  3. Whisk together flour, baking powder, and salt in a separate bowl; set aside.
  4. Put sugar, eggs, and vanilla in the bowl of an electric mixer fitted with the whisk attachment, and beat on medium speed until pale, about 4 minutes. Add chocolate mixture; beat until combined. Add flour mixture; beat, scraping down sides of bowl, until well incorporated.
  5. Pour batter into prepared pan; smooth top with a rubber spatula. Bake until a cake tester inserted into brownies (avoid center and edges) comes out with a few crumbs but is not wet, about 35 minutes. Let cool slightly in pan, about 15 minutes. Lift out brownies; let cool completely on a wire rack before cutting into squares.
*We are fans of bittersweet chocolate so I use the Ghirardelli bittersweet 60% cacao chips in most recipes now, including this one. I am sure the brownies will be just as delicious with semi-sweet.

From Martha Stewart's Cookies